Master Bathroom Renovation


Our house was built in 1988, and at 30 years old, the only changes ever made to it (prior to us buying) were changing the flooring and switching out some fixtures for even uglier ones. But regardless of all that, renovating our master bathroom was not in our plans for 2018. In fact, we were - and still are - in the middle of renovating our guest bathroom (more on that in a later post) when all of this went down.
Cue a serious water leak in the master bathroom just months into the guest bathroom job. Water started slowly trickling out from underneath the dated shower pan every time we would shower. Then when spring officially hit, we fell victim to a massive springtail infestation in there. If you don't know what springtails are, consider yourself lucky for never having to deal with them. They're the biggest (tiniest) nuisance I've ever experienced and they are drawn to moisture and mold. They reproduce by the hundreds. That's when the mold and mildew smells began, and we noticed them more and more as days went on. After much debating, we finally decided that mold was out of our DIY scope of knowledge and opted to have the whole bathroom gutted and rebuilt by professionals.
With a 2nd bathroom renovation scheduled, we realized we were going to be left with no bathroom to use in the house. We toyed with a lot of scenarios - holding off this new project until we finished the guest bathroom, getting at least the shower and toilet set up in the guest bath, moving out completely. We opted to move out completely since, realistically, we could only work so fast on the other bathroom and knew mold was a serious problem.
Thankfully, my mom let us move in temporarily (6 weeks) while our crew got to work on the bathroom. We stopped by and checked on it weekly, and were not so surprised to find black mold growing on the drywall behind the shower tiles, as well as leaks and some cracks in the concrete foundation. Our crew was awesome, though. They were very attentive to detail and made sure everything was replaced and done correctly. With only a few minor setbacks, and our bank account a little sadder, we were able to move back in 6 weeks later and enjoy our new space... and honestly, what a crazy difference it all made. We were stunned when we walked in and saw everything finished. It was more beautiful than we had hoped for. We still get excited every time we're in it, and I've taken to sleeping with the bathroom door open because I love getting a glimpse of it from our bed.
Now, on to the before and afters!

BEFORE
AFTER
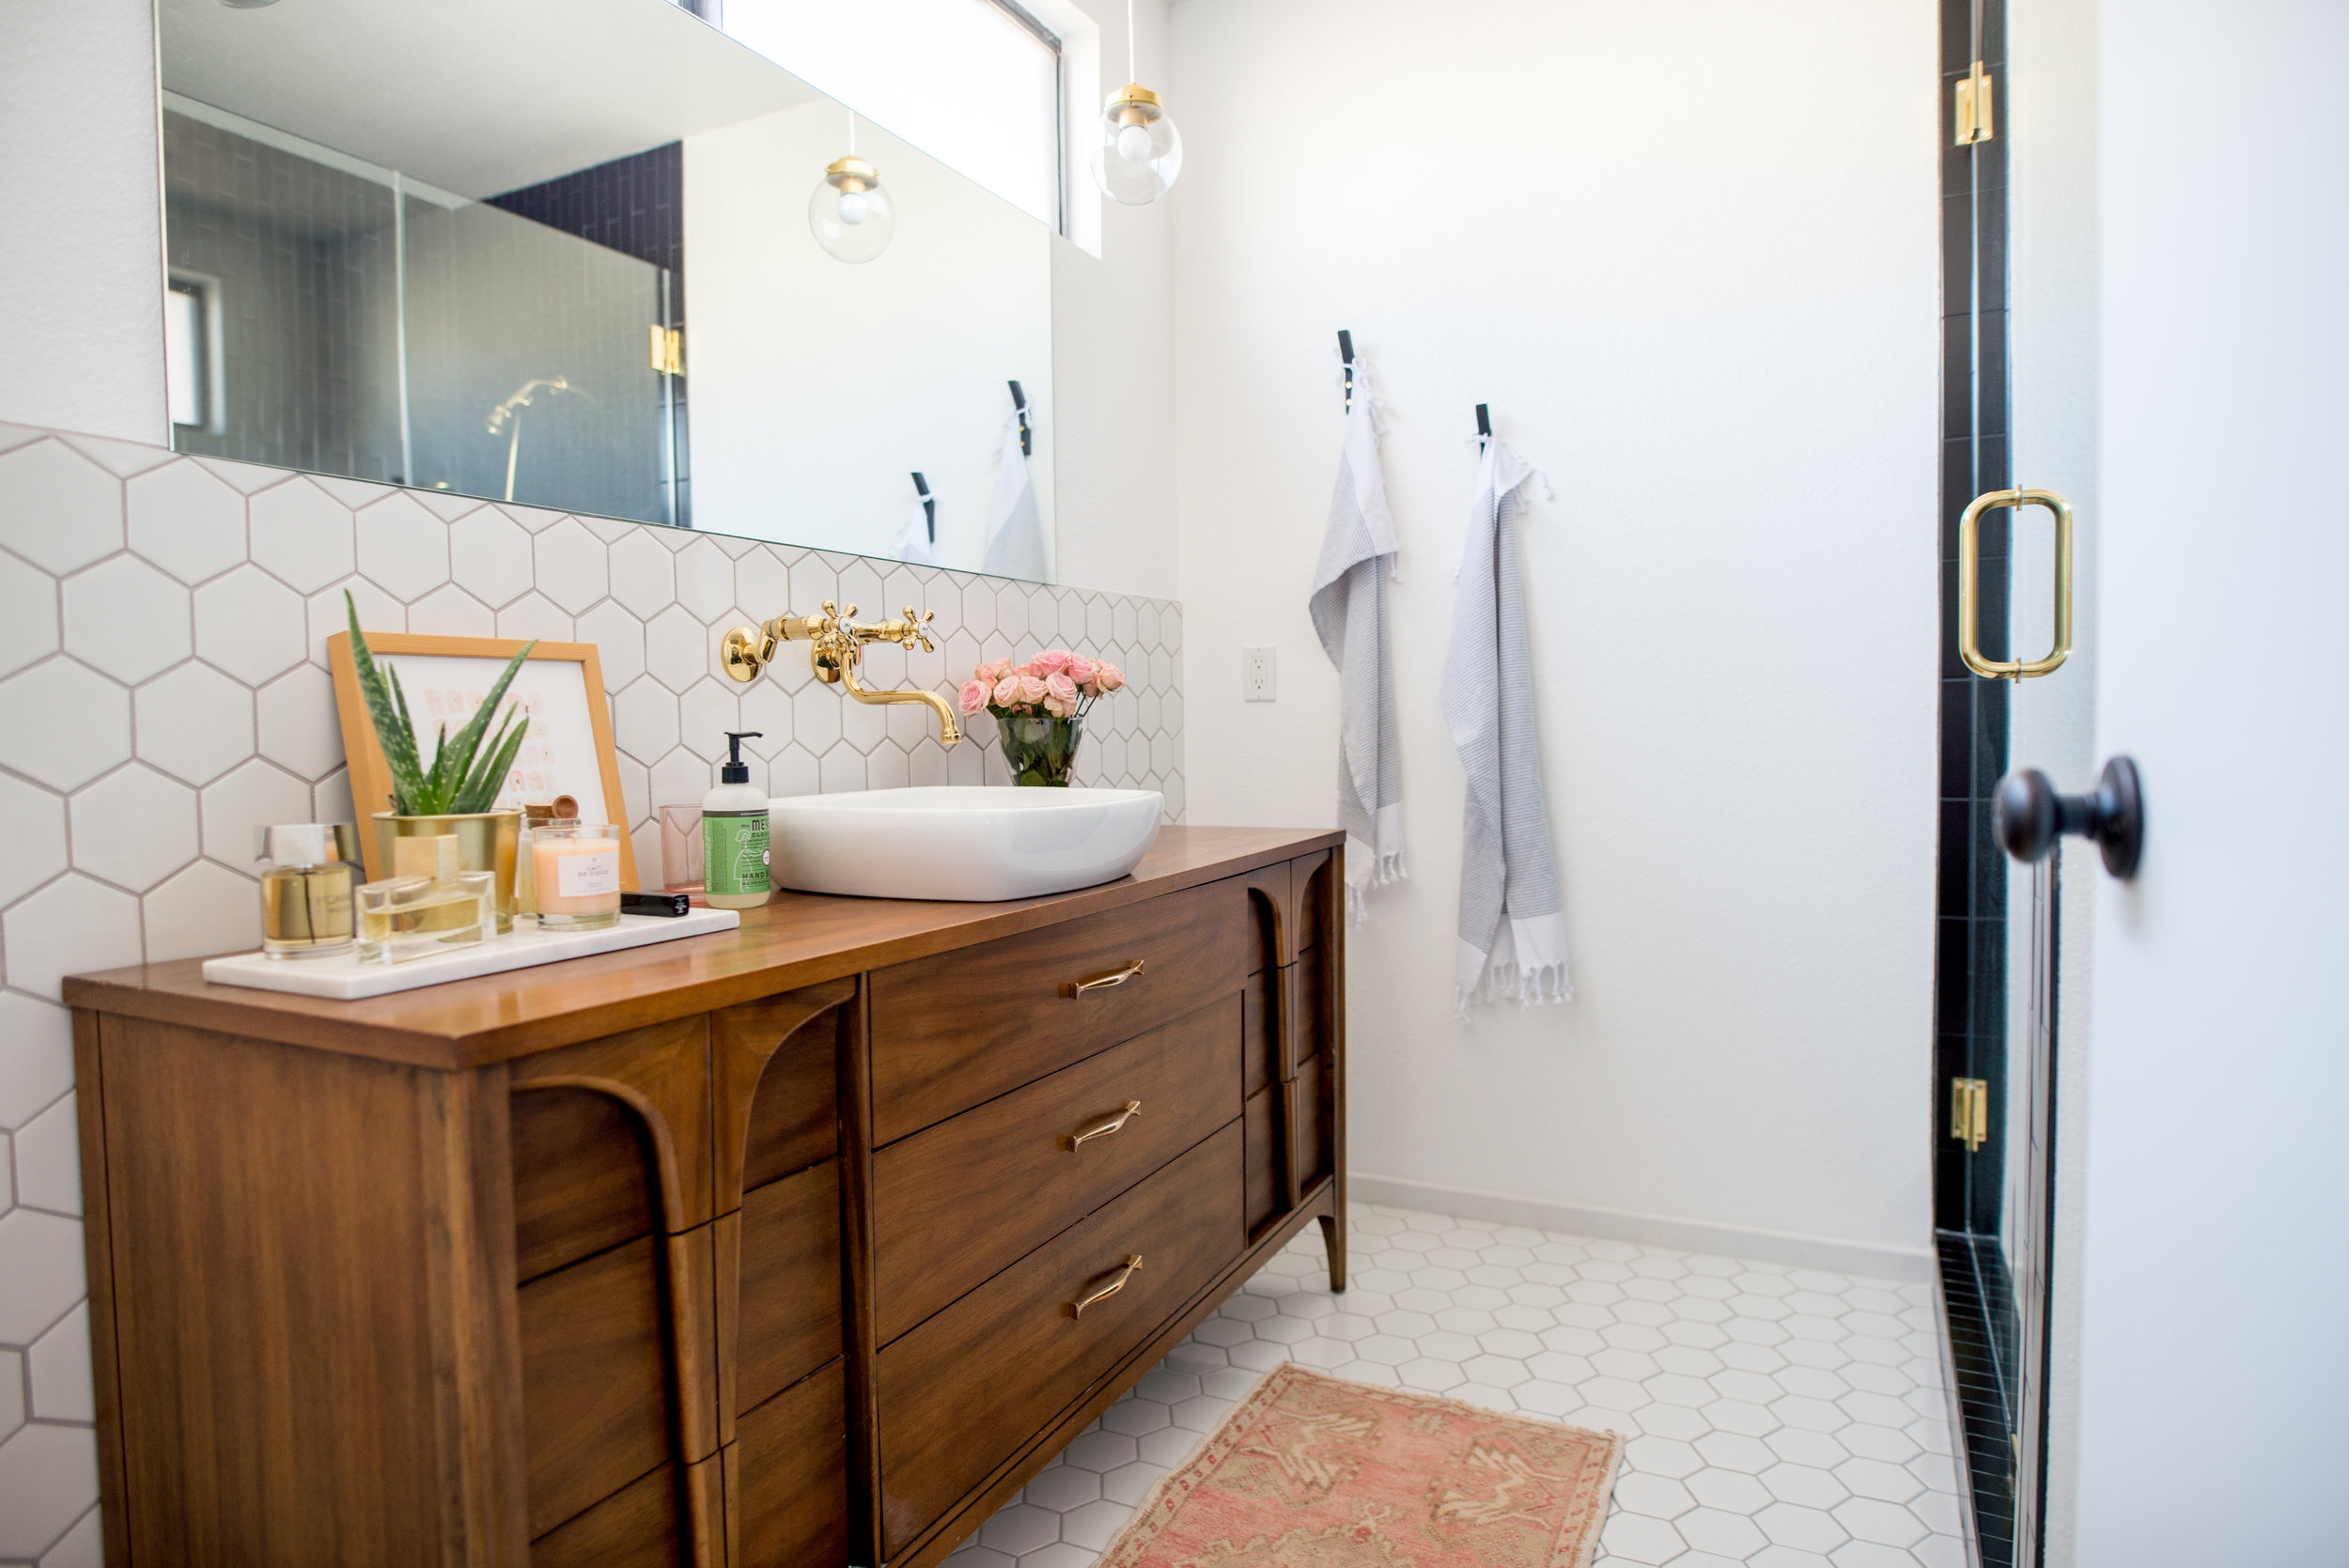
As you can see in the before, the vanity was a built-in with dual sinks. Right before buying the home, the old owner switched out the dated tile for some granite. We weren't really fans of the granite look and absolutely hated the color. We opted for a vintage, mid-century dresser instead and I found this amazing one with beautiful, original brass pulls on OfferUp for a total steal (it came with the matching nightstand) - $400! A few days later, we actually saw the same exact model selling on Chairish for $1,200!! Remember to shop locally first, people. You never know what amazing treasures you'll find on Craigslist, OfferUp, etc. Could be worth so much than what it's selling for.

BEFORE

AFTER

In order to make the vanity work, our plumber drilled through the drawers below where the sink would sit to allow space for the P-trap connection. Instead of rendering the drawers totally unusable, we notched out the space needed for the pipes and are able to still use the rest of the drawer for storage. Thank you Pinterest for these creative ideas!
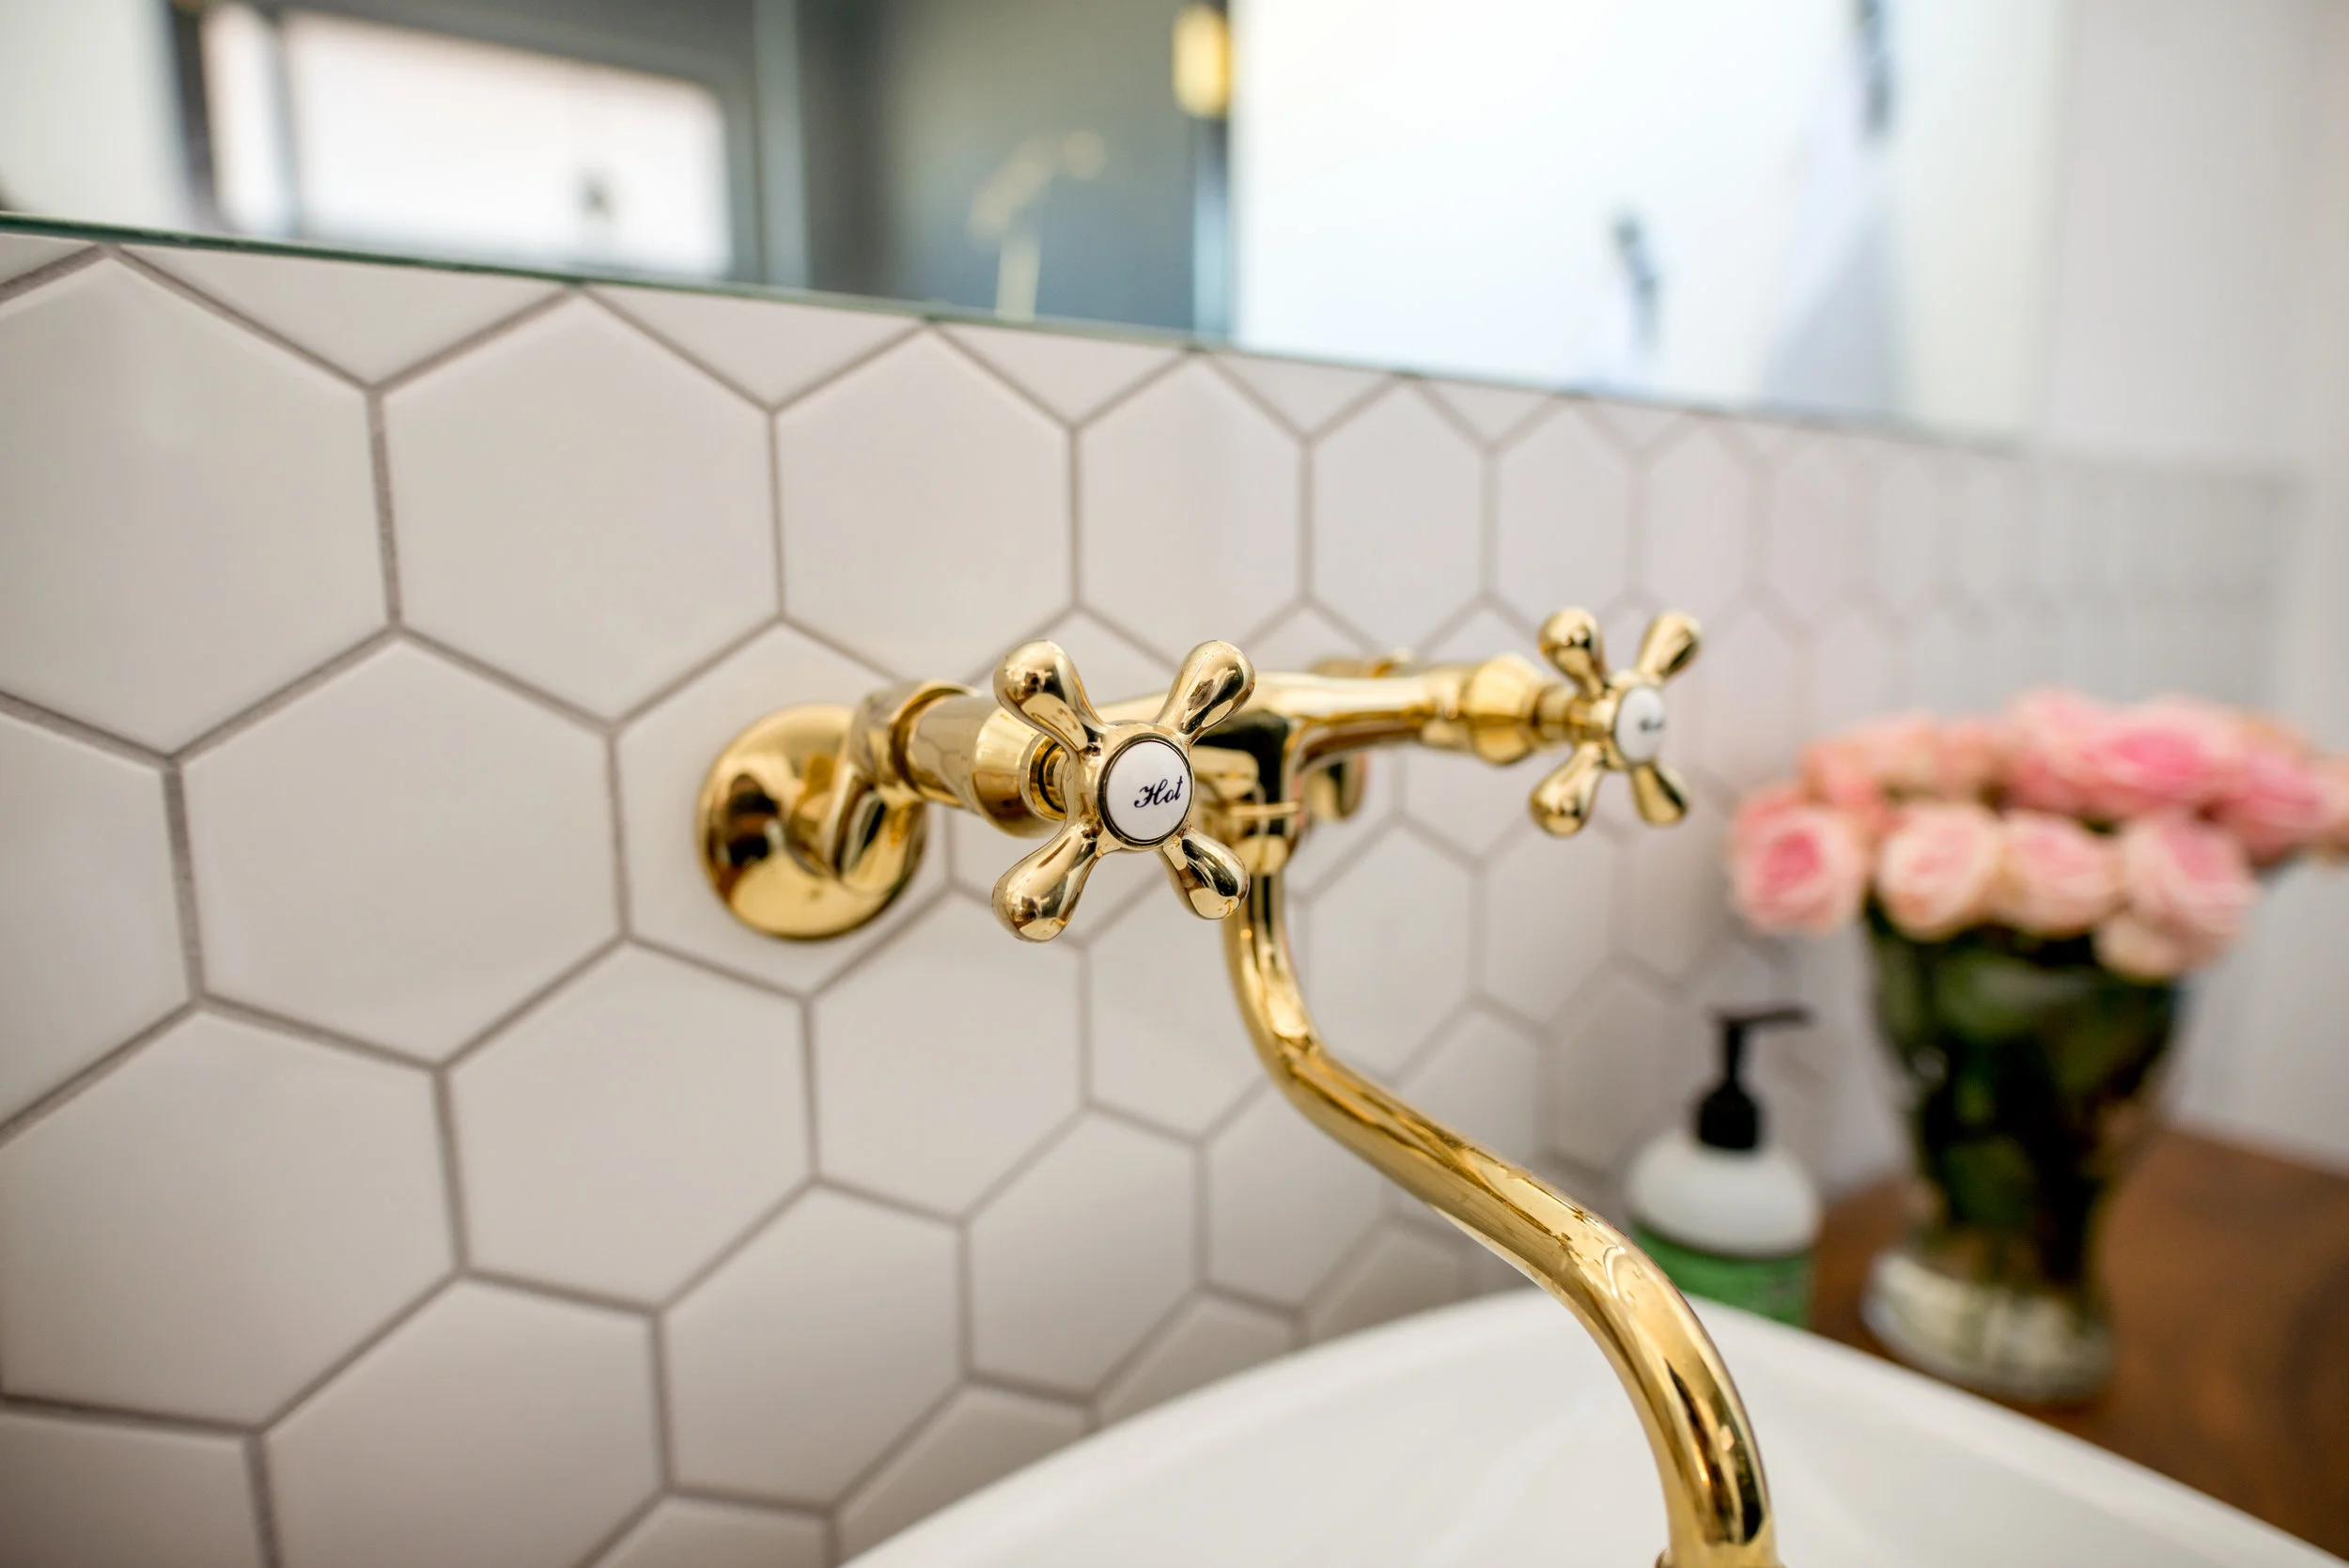
For this bathroom, we wanted to mimic some of the shapes and patterns we'll be using in the guest bathroom and other spaces in our home. Our guest bathroom has black tiled floors and we're still debating on the wall tile shape, but we do know it will be white. So for this one, we went with white hexagon tiles on the floor and decided to also bring them up on the wall behind the vanity as a backsplash of sorts. I think it really makes the brass fixtures pop and it also gives the mirror a ledge to rest some weight on.

BEFORE

AFTER
ON TO OUR FAVORITE PART -- THE SHOWER!! Look at this beauty. Tall, dark, and handsome! ;) We went with a slim, black tile here and have it running in a vertical subway pattern. For the floor, we used black penny tile with matching dark grout. Originally, the tiles stopped a little above the shower head, but for that extra drama effect, we had them continue all way up to the ceiling.

Our contractor added a wall niche for us, and also built a pony wall to accomodate the longer niche for all of our bottles. We decided to spend the extra money now instead of regretting later, and went with a fully frameless glass enclosure. The brass fixtures were a perfect match and really made everything stand out. Showers in here feel extra relaxing and we're constantly feeling like we're in a spa, not our own home.


And there you have it, folks! We spent weeks online sourcing all the little details, such as our rug, towel hooks, lights, and even our toilet paper holder. But every minute spent sourcing and stressing was totally worth it, and we absolutely love our new space. Here's to hoping the guest bathroom will go just as smoothly, so that we can keep with our plan of starting the kitchen in February!!
SHOP THIS POST:
Floor/Wall Tile // Shower Tile // Shower Floor Tile // Wastebasket // Toilet Paper Holder // Towel Hooks // Rug - Vintage, Etsy // Vanity Lights // Vanity - Vintage, OfferUp // Marble Tray // Candle // Vaginas Print // Faucets (Sink, Shower) // Plant Pot // Turkish Towels